Subcision for Acne Scars: How It Works, Results, Cost & What to Expect
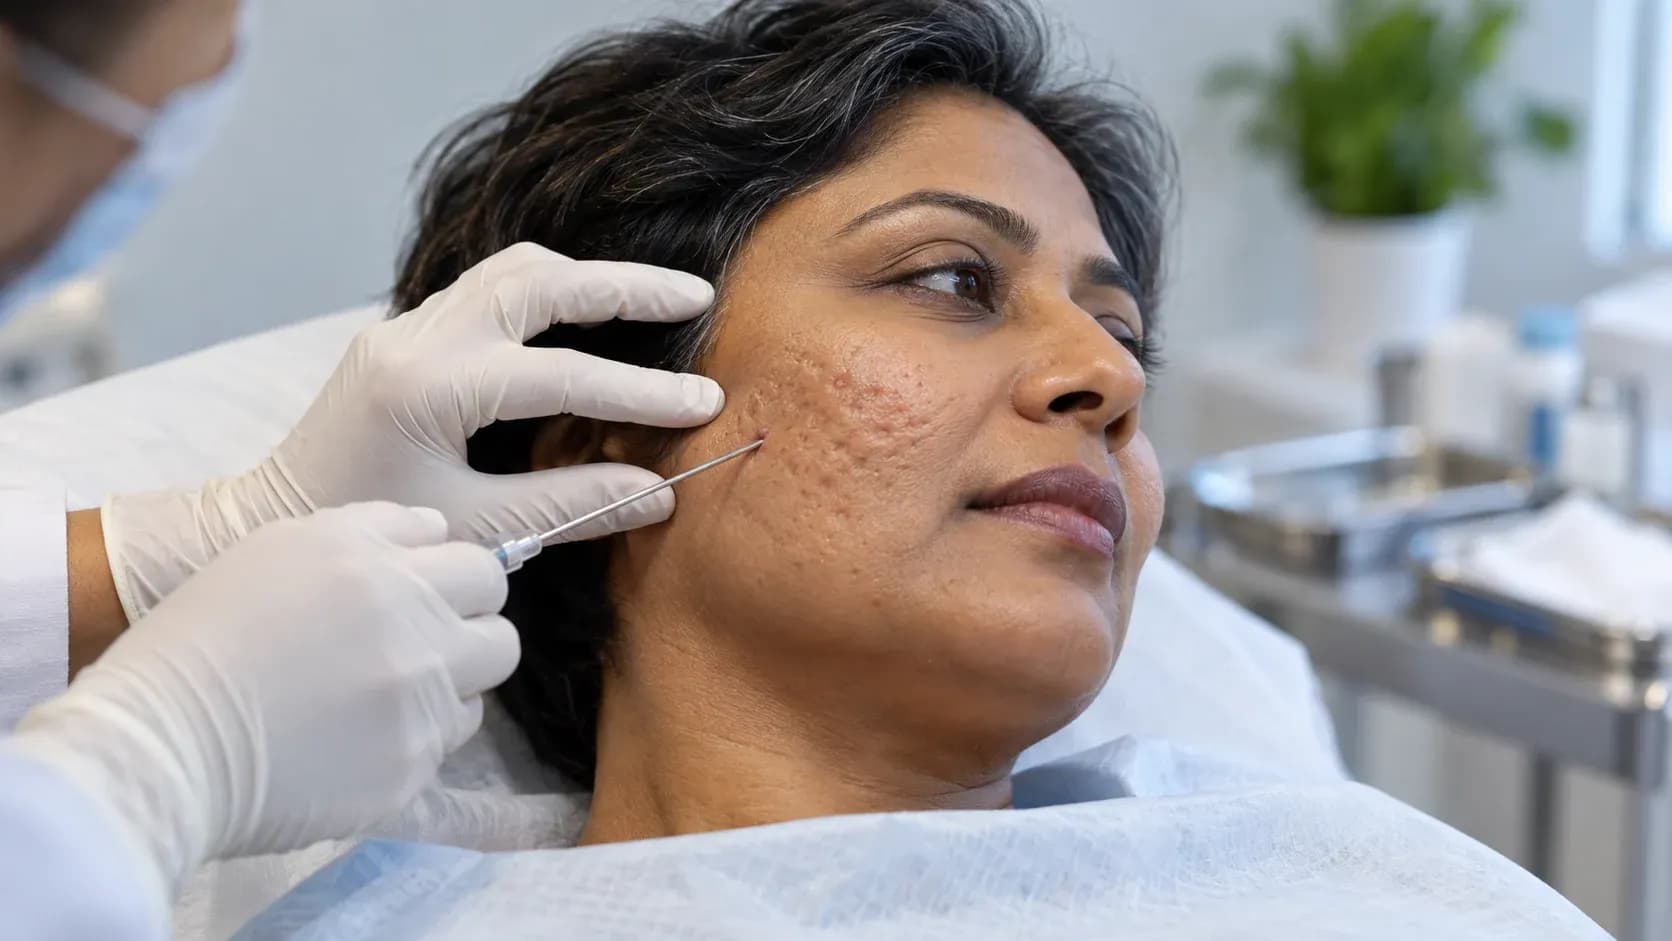
Subcision for acne scars is a minor in-office procedure that cuts the fibrous bands anchoring depressed scars to deeper skin layers, allowing the skin surface to lift and collagen to rebuild from beneath. It does not resurface the skin or dissolve tissue: it solves the mechanical problem that no cream, peel, or laser alone can fix.
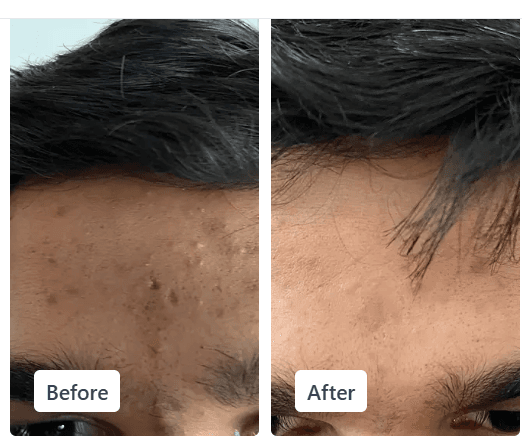
Most people with rolling or tethered boxcar scars see 30 to 70% visible improvement over two to four sessions, with full results appearing three to six months after the final treatment as new collagen matures.
At a glance:
- Best for: Rolling scars and tethered boxcar scars with fibrous bands
- Sessions needed: 2 to 4, spaced 6 to 8 weeks apart
- Downtime: 7 to 14 days of bruising; no wound care beyond gentle cleansing
- Permanence: Semi-permanent to permanent, released bands rarely fully reattach
- Often combined with: Dermal fillers, fractional laser, or microneedling for surface texture
What Are Tethered Acne Scars and Why Does Scar Type Determine Your Treatment?
Tethered acne scars are depressed skin indentations held in place by fibrous bands, strands of scar tissue that form beneath the skin surface and anchor the overlying dermis downward, pulling it like tent pegs pinning fabric to the ground.
These bands are the reason deep acne scars look like shadows or craters even after years of consistent skincare. No topical product reaches the layer where the anchoring happens.
Subcision is the procedure specifically designed to cut these bands. The term comes from subcutaneous incision, a needle inserted parallel to the skin surface physically severs the fibrous attachments, freeing the depressed skin to rise.
Why this distinction matters for treatment:
- Not all acne scars are tethered. Ice pick scars are narrow channels; shallow atrophic scars lack significant fibrous bands
- Tethering is the defining feature of rolling scars and many wider boxcar scars
- Identifying whether your scar is tethered determines whether subcision is appropriate, or whether resurfacing alone will be sufficient
A dermatologist confirms tethering by pressing alongside the scar. If the depression visibly lifts when surrounding tissue is stretched, fibrous bands are present and subcision is indicated.
What Happens Inside Deep Acne Scars, and Why Topical Products Cannot Fix Them
Deep acne scars form when severe inflammatory acne penetrates deep into the dermis and destroys the skin's structural collagen framework.
As inflammation resolves, the body attempts to repair this damage with scar tissue. Unlike normal collagen, which forms in a basket-weave pattern, scar collagen forms in parallel bundles that contract over time. This contraction creates fibrous bands that anchor the surface skin to deeper tissue layers, producing a visible depression that does not respond to topical treatments because the problem exists beneath the skin's surface.
The depth and pattern of scarring depends on how deeply the original inflammation penetrated:
- Ice pick scars tunnel straight down in narrow channels
- Boxcar scars create defined rectangular or oval depressions with distinct edges
- Rolling scars form broad, wave-like undulations across the skin surface
Each scar type reflects a different damage pattern to the underlying collagen architecture, and each requires a different treatment approach. Subcision is specifically indicated when fibrous tethering is the mechanical cause of the depression.
According to Clear Ritual's dermatology team, the most common mistake patients make is applying resurfacing treatments to scars that have a structural, not textural, cause. Surface-level treatments cannot release the anchors holding depressed tissue down.
How Subcision Works: The Mechanism Behind Fibrous Band Release
Subcision addresses the mechanical problem at its source by physically severing the fibrous bands that anchor depressed scar tissue downward.
The mechanism works in two stages:
Stage 1, Mechanical release: A dermatologist inserts a specialised needle or blade beneath the scar, parallel to the skin's surface. A fanning motion sweeps the instrument back and forth, cutting through fibrous bands from multiple angles. Once these anchoring bands are cut, the depressed skin lifts upward.
Stage 2, Collagen stimulation: The procedure causes controlled bleeding in the space beneath the scar. Blood pools under the released tissue, forms a temporary clot, and as the body resorbs this clot over several weeks, it triggers new collagen production in the previously scarred area. This newly formed collagen acts as natural filler, providing volume and structural support beneath the scar.
The combination of released tension and new collagen deposition elevates the depressed area closer to the surrounding skin level. Improvement continues for months as collagen remodeling progresses, which is why results are not fully visible until three to six months after treatment.
Simplified causal chain:
Fibrous bands severed → skin lifts mechanically → controlled bleeding occurs → clot triggers collagen cascade → new collagen fills space → scar elevation continues for 3 to 6 months
Which Acne Scar Types Respond Best to Subcision: A Scar-by-Scar Guide
Subcision works mechanically, so its effectiveness depends entirely on whether fibrous bands are causing the depression. Scar type determines treatment response.
| Scar Type | Tethered? | Subcision Response | Best Combined Treatment |
|---|---|---|---|
| Rolling scars | Yes, wide fibrous bands | Excellent (most dramatic lift) | Subcision + filler or PRP |
| Boxcar scars (wide, shallow-angled edges) | Often yes | Good, may need multiple passes per scar | Subcision + fractional laser |
| Boxcar scars (narrow, steep walls) | Partially | Moderate, walls limit lifting | Subcision + punch excision |
| Ice pick scars | Rarely | Poor for subcision alone | Punch excision + TCA CROSS |
| Shallow atrophic scars | No | Minimal, few bands to release | Microneedling or resurfacing |
| Hypertrophic / raised scars | No | Not indicated | Steroid injection, laser |
Rolling scars typically show the most dramatic improvement. These broad, wave-like depressions are held down by relatively wide fibrous bands that respond well to mechanical release. The gentle slopes of rolling scars allow released tissue to lift smoothly and blend with surrounding skin.
Boxcar scars with sloped or gently angled edges also respond favourably. Wider boxcar scars may require multiple subcision sessions to address all anchoring points along their perimeter. Narrow, steep-walled boxcar scars respond only partially because the rigid walls limit how much the released tissue can rise.
Ice pick scars are narrow and deep, making them less ideal candidates for subcision alone. These typically require punch excision or TCA CROSS alongside subcision for meaningful improvement.
Shallow atrophic scars without significant tethering see minimal benefit from subcision since there are few fibrous bands to release. These respond better to resurfacing treatments that stimulate overall collagen production.
Dermatologists grade scar response using the Goodman & Baron qualitative scar grading system. Grade 3 to 4 rolling scars, visible at social distances, not corrected by stretching alone, typically show the most reliable improvement with subcision.
The Subcision Procedure: What Happens Step by Step
Subcision is performed in-office under local anaesthetic and typically takes 30 to 60 minutes depending on the number of scars treated. No general anaesthesia or hospitalisation is required.
Step-by-step procedure sequence:
- Cleansing and marking: The dermatologist cleanses the treatment area and marks the scars to be treated
- Local anaesthesia: A topical or injected local anaesthetic numbs the skin. Some practitioners use ice or vibration to further reduce discomfort during needle insertion. The anaesthetic takes several minutes to work fully before the procedure begins
- Skin preparation: The practitioner stretches the skin taut to stabilise the treatment area and improve access to the fibrous bands beneath
- Needle insertion: A subcision needle, most commonly a Nokor needle or blunt cannula, is inserted through a small entry point near the scar, kept parallel to the skin's surface
- Band release: A fanning motion sweeps the needle back and forth beneath the scar tissue, severing fibrous bands from multiple angles. You may feel pressure and tugging, but pain should be minimal with adequate anaesthesia
- Mobility assessment: The practitioner presses on the scar surface to assess how freely the tissue now moves. Subcision continues until the tissue moves freely
- Post-procedure pressure: The dermatologist applies pressure to minimise excessive bleeding and help distribute blood evenly beneath the released tissue. This controlled bruising is intentional, it supports the collagen healing response
- Entry point care: Entry points are small enough that stitches are rarely needed. The area is cleaned and a simple dressing may be applied
Immediate swelling after the procedure makes it difficult to assess final results straight away. The real improvement develops over the following weeks and months.
Subcision Technique Variations: Nokor Needle, Cannula, and Taylor Liberator
The term "subcision" covers several instrument approaches. The dermatologist's choice of tool affects how deeply the bands are cut, how much bleeding occurs, and recovery time.
The three main subcision instruments:
1. Nokor needle (bevelled tri-bevel needle) The traditional subcision instrument. The angled cutting tip severs fibrous bands efficiently and produces predictable controlled bleeding. Most widely used for rolling and moderate boxcar scars. Creates more bruising than cannula approaches, which supports collagen stimulation through a stronger healing response.
2. Cannula (blunt-tip cannula) A blunt cannula reduces the risk of blood vessel damage and results in less bruising than a sharp needle. This approach is sometimes preferred in thin-skinned areas such as the temples or around the eyes. The trade-off: less mechanical cutting force means the dermatologist must make more passes to achieve the same degree of band release.
3. Taylor Liberator A modified instrument designed specifically for subcision. Its S-curved tip allows a fanning motion in multiple directions from a single entry point, reducing the number of skin punctures needed. Used by specialist scar revision practitioners; not universally available.
Does instrument choice affect results? Research comparing Nokor needle versus cannula subcision suggests comparable scar improvement at three months, with cannula approaches producing less immediate bruising but similar collagen remodelling outcomes. A 2021 study in the Journal of Cosmetic Dermatology found no statistically significant difference in patient satisfaction between the two techniques at six months.
When consulting a dermatologist, ask which instrument they routinely use and why. This tells you about their training and experience with the procedure, which matters more than the specific tool chosen.
What to Expect After Subcision: Recovery Day by Day
Subcision downtime is typically 7 to 14 days before bruising clears, though most people return to work and social activity within 5 to 7 days depending on how visibly bruised they are and their personal comfort level.
| Day | What to Expect | What to Do |
|---|---|---|
| Day 0 (treatment) | Swelling, redness, oozing at entry points | Ice gently, sleep with head elevated |
| Day 1 to 2 | Bruising intensifies, peaks dark purple | Gentle fragrance-free cleanser, no rubbing |
| Day 3 to 4 | Bruising transitions to blue-green | Resume light activity; avoid direct sun |
| Day 5 to 7 | Bruising fades to yellow-green | SPF 50+ daily; avoid actives (retinol, AHA) |
| Day 8 to 10 | Most bruising gone; area may feel firm | Light exfoliation okay if skin is intact |
| Day 10 to 14 | Surface healed; slight firmness beneath | Resume full routine minus heavy gym sessions |
| Week 3 to 4 | External appearance normal | Collagen building beneath surface, patience required |
During the first week, the skin feels tender and tight. Sleeping with your head elevated reduces swelling and discomfort. Some patients see a slight lift even at the end of the first week as swelling resolves, but this is not the final result.
What NOT to do during subcision recovery:
- Do not massage or press the treated area for at least 7 days, this disrupts clot formation essential to the collagen response
- Do not take ibuprofen or aspirin unless medically required, anti-inflammatories block the healing response that subcision depends on
- Do not apply retinol, glycolic acid, or vitamin C serums until the surface has fully closed
- Do not book laser or RF treatments within 6 weeks, allow collagen to establish first
- Do not expose the area to direct sun without mineral SPF, hyperpigmentation risk is elevated during healing
Clear Ritual's skin care guidance emphasises that the recovery phase is as important as the procedure itself. What patients do, and do not do, in the first two weeks directly affects collagen quality and final scar improvement.
Subcision Recovery Guidelines: Skincare, Sun Protection, and Activity
Proper aftercare following subcision protects the collagen-building response and minimises complications during the healing window.
Skincare during recovery:
Keep the treated area clean but avoid harsh cleansers or exfoliants for at least one week. Gentle, fragrance-free products minimise irritation while the skin heals. Pat the area dry rather than rubbing to avoid disrupting healing tissue beneath the surface. Avoid applying active ingredients, retinol, glycolic acid, salicylic acid, or vitamin C, until the surface has fully healed.
Sun protection:
Sun protection becomes critical after subcision. Healing skin is vulnerable to UV damage that can cause post-inflammatory hyperpigmentation, especially in darker skin tones. Mineral sunscreens with zinc oxide or titanium dioxide provide physical protection without chemical ingredients that might irritate healing skin. Apply SPF 50+ daily from day three onward and continue for at least two months post-procedure.
Activity restrictions:
Avoid strenuous exercise and activities that increase blood pressure for three to five days. Elevated blood pressure can increase bruising and swelling in the treated area. Light walking is appropriate, but skip intense cardio, weightlifting, or hot yoga until initial healing completes.
Medication considerations:
Do not take anti-inflammatory medications like ibuprofen unless medically necessary during the first week. These medications interfere with the inflammatory healing response that triggers new collagen production. The controlled inflammation after subcision is therapeutic, not a problem to suppress.
How Long Does Subcision Take to Work? A Month-by-Month Results Timeline
Most patients want to know two things before committing to subcision: how long is the recovery, and how long until results are visible? Here is an honest, month-by-month breakdown.
Immediate aftermath (Days 1 to 3): Bruising and swelling peak around day two or three. The treated area may look worse than before treatment, this is normal and expected. Blood pooling beneath the released tissue is intentional; it triggers the collagen cascade.
First week (Days 4 to 10): Bruising transitions from dark purple to yellow-green and fades toward the skin's background tone. Tenderness decreases. Some patients see a slight lift even at this stage as swelling resolves, but this is not the final result.
Weeks 2 to 6: The body resorbs the clot and begins laying down new collagen beneath the released scar. No visible surface change is typical at this stage, the work is happening beneath the surface.
Months 2 to 4: Collagen deposition creates measurable scar elevation. Clinical studies document an average 30 to 60% reduction in scar depth at three months post-subcision when combined with platelet-rich plasma (PRP) or fillers.
Months 4 to 12: Collagen continues to mature, reorganise, and strengthen. Most patients report that their skin looks better at nine to twelve months than at six months. This extended remodelling phase is why patience is non-negotiable.
Is subcision permanent? For most patients, subcision results are semi-permanent to permanent. Once fibrous bands are severed and replaced by loose connective tissue and new collagen, they do not typically reform to their original extent. However, new acne breakouts can create additional scarring, and normal skin ageing affects overall texture over time. Some patients schedule a single maintenance session every one to two years.
Citable one-liner: Subcision results are considered semi-permanent because severed fibrous bands are replaced by new collagen, not by reformation of the original scar attachment.
Combining Subcision with Other Treatments for Better Results
Subcision rarely works as a standalone treatment for optimal scar improvement. Most dermatologists recommend combining it with complementary procedures that address different aspects of scar texture and depth. Timing these combinations correctly maximises results while minimising complications.
Dermal fillers: Fillers injected immediately after subcision can provide additional volume beneath released scars. The filler occupies the space under the scar, preventing fibrous bands from reattaching as healing progresses. Hyaluronic acid fillers work well for this purpose and may provide temporary volume while the area heals.
Fractional laser: For scars with surface texture changes as well as tethering, a dermatologist may recommend a laser after the area has recovered. The sequence and interval depend on your skin and procedure plan.
Microneedling: This may help with shallower texture changes alongside subcision for deeper, tethered areas. Your clinician should decide when the skin is ready for another procedure.
How Much Does Subcision for Acne Scars Cost?
The cost depends on the number and location of scars, the technique, how many sessions you need, the clinician's fees, and whether filler or another procedure is included. Ask for a written estimate showing the fee per session, expected number of sessions, and any separate charges for combination procedures.
A dermatologist can assess your scar types before quoting a plan. Comparing prices without knowing whether the proposed treatment addresses tethering may lead to the wrong choice.
Who Should Discuss Subcision With a Dermatologist?
Subcision may be considered for rolling scars and some boxcar scars that remain depressed when the surrounding skin is stretched. An examination is essential to determine whether those scars are tethered and whether another procedure is more appropriate.
Tell your dermatologist about active acne, a history of keloids, blood-thinning medication, prior scar procedures, and any skin infections. Follow their specific aftercare and medication instructions, including advice on pain relief and sun protection.
Clear Ritual's Perspective on Subcision for Acne Scars
The first step is to identify what is holding each scar down. Subcision is most relevant when fibrous bands are involved, and the plan may include another procedure for surface texture or lost volume.
At Clear Ritual, we encourage a scar assessment and a realistic discussion of sessions, downtime, costs, and expected improvement before deciding on treatment.
Find a routine that supports scar care
Take the Clear Ritual Skin Test to understand your breakouts and skin concerns before planning your next steps.
Take the Skin Test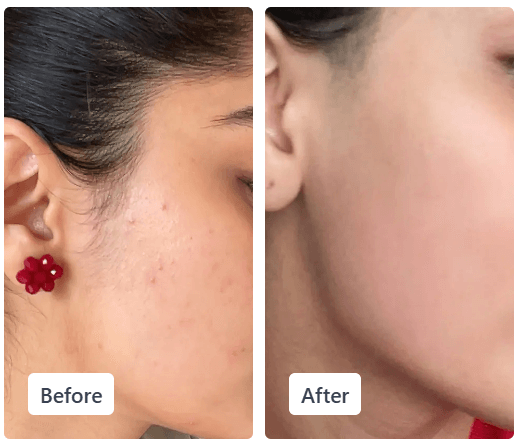
Frequently Asked Questions
1. Which acne scars respond best to subcision?
Rolling scars and some tethered boxcar scars are the main candidates. A dermatologist must examine the scars to confirm that fibrous bands are pulling the skin downward.
2. How many subcision sessions might be needed?
Some people need more than one session. The number depends on scar depth, tethering, healing, and whether other procedures are part of the plan.
3. How long does it take to see subcision results?
Swelling may change the appearance at first. Scar improvement develops gradually as the area heals and collagen remodels over several months.
4. Is subcision suitable for ice pick scars?
Ice pick scars usually respond poorly to subcision alone because their narrow, deep shape often requires another technique.
5. Is subcision permanent?
Released bands may remain separated, but outcomes vary and other scars can remain. An assessment can clarify what improvement is realistic for your scar pattern.
References
Disclaimer
This article is for general information. Subcision is a clinical procedure, and your dermatologist's assessment, aftercare, and medication instructions should guide your care.
Editorial Standards
Clear Ritual has Strict sourcing guidelines to ensure our content is accurate and current. We rely on peer-reviewed studies, academic research institutions, and medical associations. We strive to use primary sources and refrain from using tertiary references. See a mistake? Learn More about our Editorial Standards.